Your watermark is stamped on every preview a buyer sees. The clean, full resolution file is never watermarked, and it is only released after someone pays. Setting a watermark is a good first step, so your very first previews go out looking the way you want.
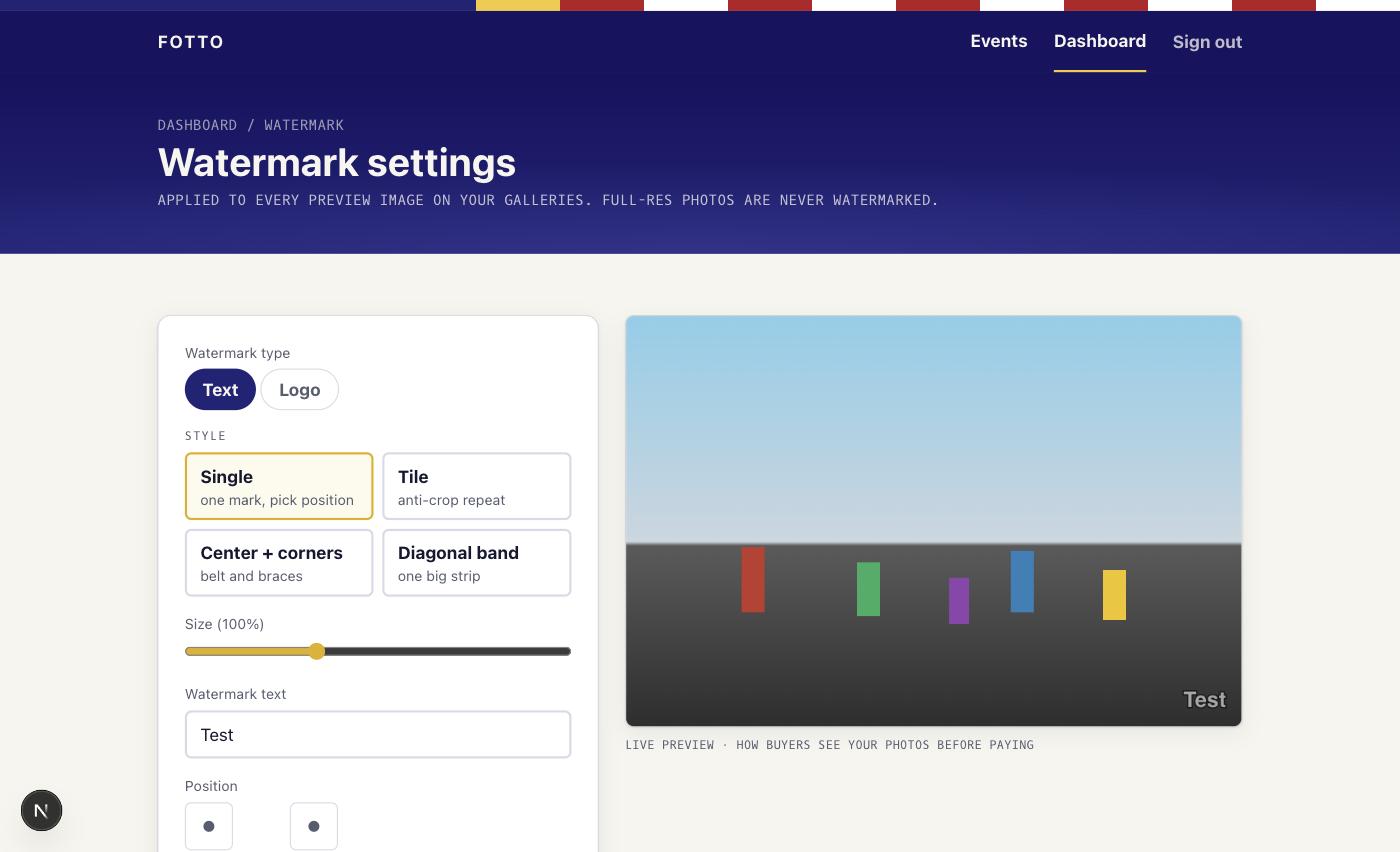
Open Watermark settings from your dashboard.
Text or logo
- Text stamps your studio name (or any words you type). Simplest to start with.
- Logo stamps an image you upload, for example your studio mark. PNG files only, up to 2 MB.
Choose a style
Four styles control how the mark is placed:
- Single: one mark, in a corner or centre you pick.
- Tile: the mark repeats across the whole photo. Hardest to crop out.
- Center + corners: a mark in the middle and in the corners.
- Diagonal band: one large mark running across the photo.
Use the Size and opacity sliders to make the mark clear without hiding the shot, and watch the live preview on the right update as you go. Tile is the most crop resistant if you are worried about people trying to lift your previews.
Note
Saving applies your new watermark everywhere, instantly: new uploads and every gallery you have already published. No re-uploading, no re-processing. Change your mark any time and all your previews follow.
When it looks right, select Save. Next: set up your public profile.